After picking up a cheap bottle of Dr. Ph. Martin’s Hydrus liquid watercolour from my local art shop a few months ago, I spent a while looking for a place to use it. I found my excuse in a painting of a friend’s dog – a beautiful black and orange pup who’s portrait was crying out a strong base colour.
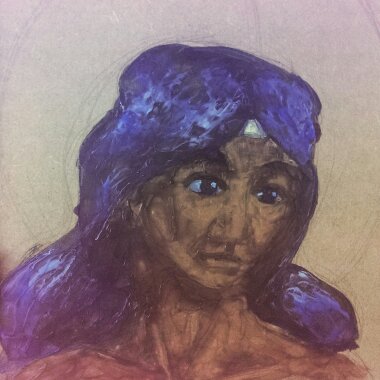
Just look at this Good Boy
I’m not normally a watercolourist, but the colour of this paint is just ridiculous (I thought the Brilliant Cad Red I bought was a neon orange when I first saw it) and I’m such a sucker for vibrant colours it was inevitable that I bought more.
Set two of Dr. Ph. Martin’s Hydrus Fine Art Watercolour contains:
Hansa Deep Yellow
Yellow Ochre
Permanent Red
Cobalt Blue
Indian Red
Viridian Green
Burnt Sienna
Alizarin Crimson
Sepia
Payne’s Gray
Sap Green
Burnt Umber
Add to that the bottle I already had, and the result is a very generous spread of colour. I’ll probably add a colour here and there as I go on (I’m already eyeing up a more brilliant yellow and a second blue) but I’ve got plenty to be getting on with.
The paint is amazing; I think I’m in love.
Being pre-mixed, it skips the frustrating “not quite enough pigment, not quite enough water” balancing act I struggle with when I use pan paints, and it blends beautifully – perhaps because the increased liquid content stops it drying too quickly and forming hard edges.
When it is dry, it layers nicely and the previous washes seem to resist being picked up by subsequent layers. We’re going to make some beautiful paintings together, I can tell already.
First time doing encaustic painting with bristle brushes. The painting was on unprimed 12mm MDF with a sketch in medium-soft (B) graphite.
Observations
The brushes didn’t drink the paint the way I expected. I suppose that’s because encaustic has more in common with oil paint than watercolour. It’s been more than ten years since I last used oil, so I was a little worried that I’d be starting from scratch, but I soon got into the swing of it.
Perhaps because I was expecting the brushes to absorb the paint more than they did, the paint went further than I expected. I’ve barely made dent in my supply and I was using it unthinned.
The initial strokes with a loaded brush were quite pleasant. The paint went down well and covered a good amount of the board, the graphite sketch didn’t seem to interfere with the application, and even though the wax cooled rapidly on the brushes, it was easily reactivated on the hot plate.
The first attempt never got the initial Ugly stage
Unfortunately, some fairly significant issues emerged during the first session. The quality of the marks left much to be desired: the initial contract with the board often left a blob of paint which rapidly hardened, resulting in a blotchy, uneven tone and surface. Worse than that, new strokes would lift the previous layers, creating bald patches that exposed the board below.
Both problems were very probably caused by me not fusing the paint until after the session.
At the end of the session, I used the heated stylus with a palette knife attachment to fuse the wax and manipulate it. I also used it to apply some opaque colours to add tints to the image, bit that’s very much within the sphere of how I’ve been using encaustic paint up to now.
Once the paint was fused, the quality of the blending and adhesion improved noticeably.
The second attempt, on primed board, was much more successful
Conclusion
This being a materials test, I didn’t think in necessary to prime the MDF and I think that hindered my ability to assess the medium properly. Due to the colour of the wood and the translucency of the paint, MDF isn’t suited to being used raw and needs to primed before use.
Ultimately, I intend to move on to ‘proper’ wood, birch ply and solid wood blocks, which will all have their own learning curve, but I’ll continue the paint tests on MDF due to its relative affordability.
One thing that this really drove home was the need to fuse paint between layers. I might look into using a blowtorch to minimise disturbing the paint, but I’ll have to be mindful of not singeing the board as MDF releases toxic vapours when burned.
Notes for next time
Prime the board
Fuse between layers
Future exploration
Prime the board using clay paint
Prime the board using wax
Prime the board using encaustic gesso (?)
Try heated palette knives (not the stylus)
Use a blowtorch for fusing
Mix with oil paint, oil pastel, MPO
Try a tonal under-drawing in graphite and/or charcoal
Include pyrography and graphic elements (not on MDF!)
Lessons learned and observations made in the first two attempts at making encaustic paint in six years.
Recipes
Attempt one: 8 parts white beeswax pellets to 1 part damar resin (by weight)Attempt two: 8 parts white beeswax pellets to 1 part damar resin (by volume)
Attempt two: 8 parts white beeswax pellets to 1 part damar resin (by volume)
Observations
Damar resin
Waiting for the damar resin to melt
In attempt one, I tried to melt the damar resin then mix the wax into the liquid. The resin wouldn’t melt in a double boiler, so I transferred it to direct heat on the hob and promptly burned it (whoops).
On the second attempt, I added the damar crystals to the wax. This was more successful (i.e.: they melted without burning) but the damar crystals didn’t fully melt into the wax and I became concerned about leaving it on the heat too long, in case the wax started to discolour.
WaxSmashing the resin crystals to reduce their surface area would almost certainly help, but that carries the risk of airborne particles – not a good thing while I’m still using the living room as a studio and sharing the space with my asthmatic partner.
Under my current working conditions, I’m not convinced that direct heat is the wrong way to go, but it clearly requires a more cautious approach.
On the first attempt, I added the wax in one go. In hindsight, this was clearly a bad idea. On the second attempt, I added it in four lots, which was far more sensible.
Elementary stuff but, since I messed it up the first time, it bears documenting.
Product
The finished wax cakes
I poured the result of the first attempt into a metal food tray and found that it stuck to the sides of the container as it dried. Getting it out will involve either destroying the container or melting the whole block and decanting it into a more suitable receptacle.
The result of the second attempt went into silicone cupcake cases. These have been far more forgiving, and the wax cakes can be removed easily. Definitely the way to go in future.
Colour
I added colour to the second batch in the form of oil paint, which had been squeezed out onto kitchen roll to draw out some of the oil. The paint was laid out in approximately 1.25 inch lines and left for a little under 48 hours. I mixed this into the wax while it was still cooling in the silicone moulds and, after some mashing, it mixed fairly well. There are some issues with the distribution of the pigment which is particularly evident in the paints made when the wax was cooler and they’re none of them as pretty or as bright as shop-bought paints, but they’re functional and significantly cheaper.
Conclusions
Measuring the wax by volume seems to be the way to go. The stickiness of the first product was unappealing and, although it could have been caused by any number of factors, weighing the wax and resin is more time-consuming and doesn’t offer noticeably better results.
Melting the wax (in batches!) before adding the damar was not an unreasonable thing to do, but I’m conscious that the wax changes consistency and colour as it gets hotter. I’ll need to do some reading on the properties of wax and damar before making a decision on whether to melt the wax or the damar first. Silicone moulds are hands down the way to go if I’m making wax cakes. The Enkaustikos-style tins have a certain appeal, but heating that much wax is going to take a while, and the tin will be a swine to clean if it gets contaminated with another colour. The cakes can be melted individually, cut, weighed and mixed methodically.
When making coloured wax, I need to be do it one cake at a time, leaving the bulk of the mixture to stay liquid. The pigment isn’t as evenly distributed and, although aesthetics weren’t high on my list of priorities, the waxes coloured later in the session look like lumps of frosting which will certainly make stacking them harder even if it doesn’t come back to bite me in some other fashion.
Notes for next time
Wear an apron
Make paints one at a time
Take more photos!
Further exploration
Explore ways to completely melt damar into the wax
Use pigment for colour (not feasible until I have a dedicated painting space)
This is going to be a tricky one to unpick because there are a lot of firsts going on in this exploration. Ostensibly, this is documenting my first thoughts on Master Paste Original (MPO) wax paste, but since it’s also my first time using painting knives, the results are likely to be muddy.
Master Paste Original
I started by using MPO pigmented with oil paint (D-R Georgian), but initially found it difficult to balance the ratio of paint to paste. Ultimately, I needed a lot less paint than I expected: a tiny dab of paint for a teaspoon of paste was sufficient. Too much oil had the entirely expected effect of turning the paste into a goopy, slow-drying cream that I recall far too well from mixing up wax and oil paints at university.My lovely new silver paint was far too oily to use and, in any case, the metal flakes didn’t fare so well in a wax medium and the whole thing turned a rather unappealing shade of green-grey.
Cleanup was pleasantly quick and pretty easy. When the wax dies it can be scraped off the knives, or they can be heated an wiped ad per my usual cleanup, and I expect some sort of spirit could be used too.
I’d like to find a way to make the paste a bit wetter, although that may improve with better ratios of paint to wax. At the moment it seems to dry very quickly and become lumpy and unspreadable. Other problems I ran into was the hot air gun pushing the molten wax around, and some issues with mixing colour which almost certainly come back to ratios again. Although Michael Bossom’s technique of interrupting the air flow with a sieve seems to work for him, I could use a blowtorch to burn in instead of the heat lamp.
Knives
The first thing I noticed was how difficult it was to get fine detail with the knives. I suspect that will be good for me, but I can see it being frustrating. Perhaps I could use them in conjunction with brushes and hotplate wax, or the tools I already use. Something to explore, certainly. Overall, I’m very pleased with the MPO. I’ve wondered before how I could get a glaze without disturbing the paint underneath, and this is a possible solution to that question.
Addendum
I have since learned that there may be some health risks associated with heating cold wax paste. I will have to do more research on the matter before I feel comfortable burning in MPO again.