At this point, my workbook and textbook diverge. The workbook has a handful more “Gestalt” exercises, while the textbook finishes up with chapters on colour and handwriting. This section covers the workbook.
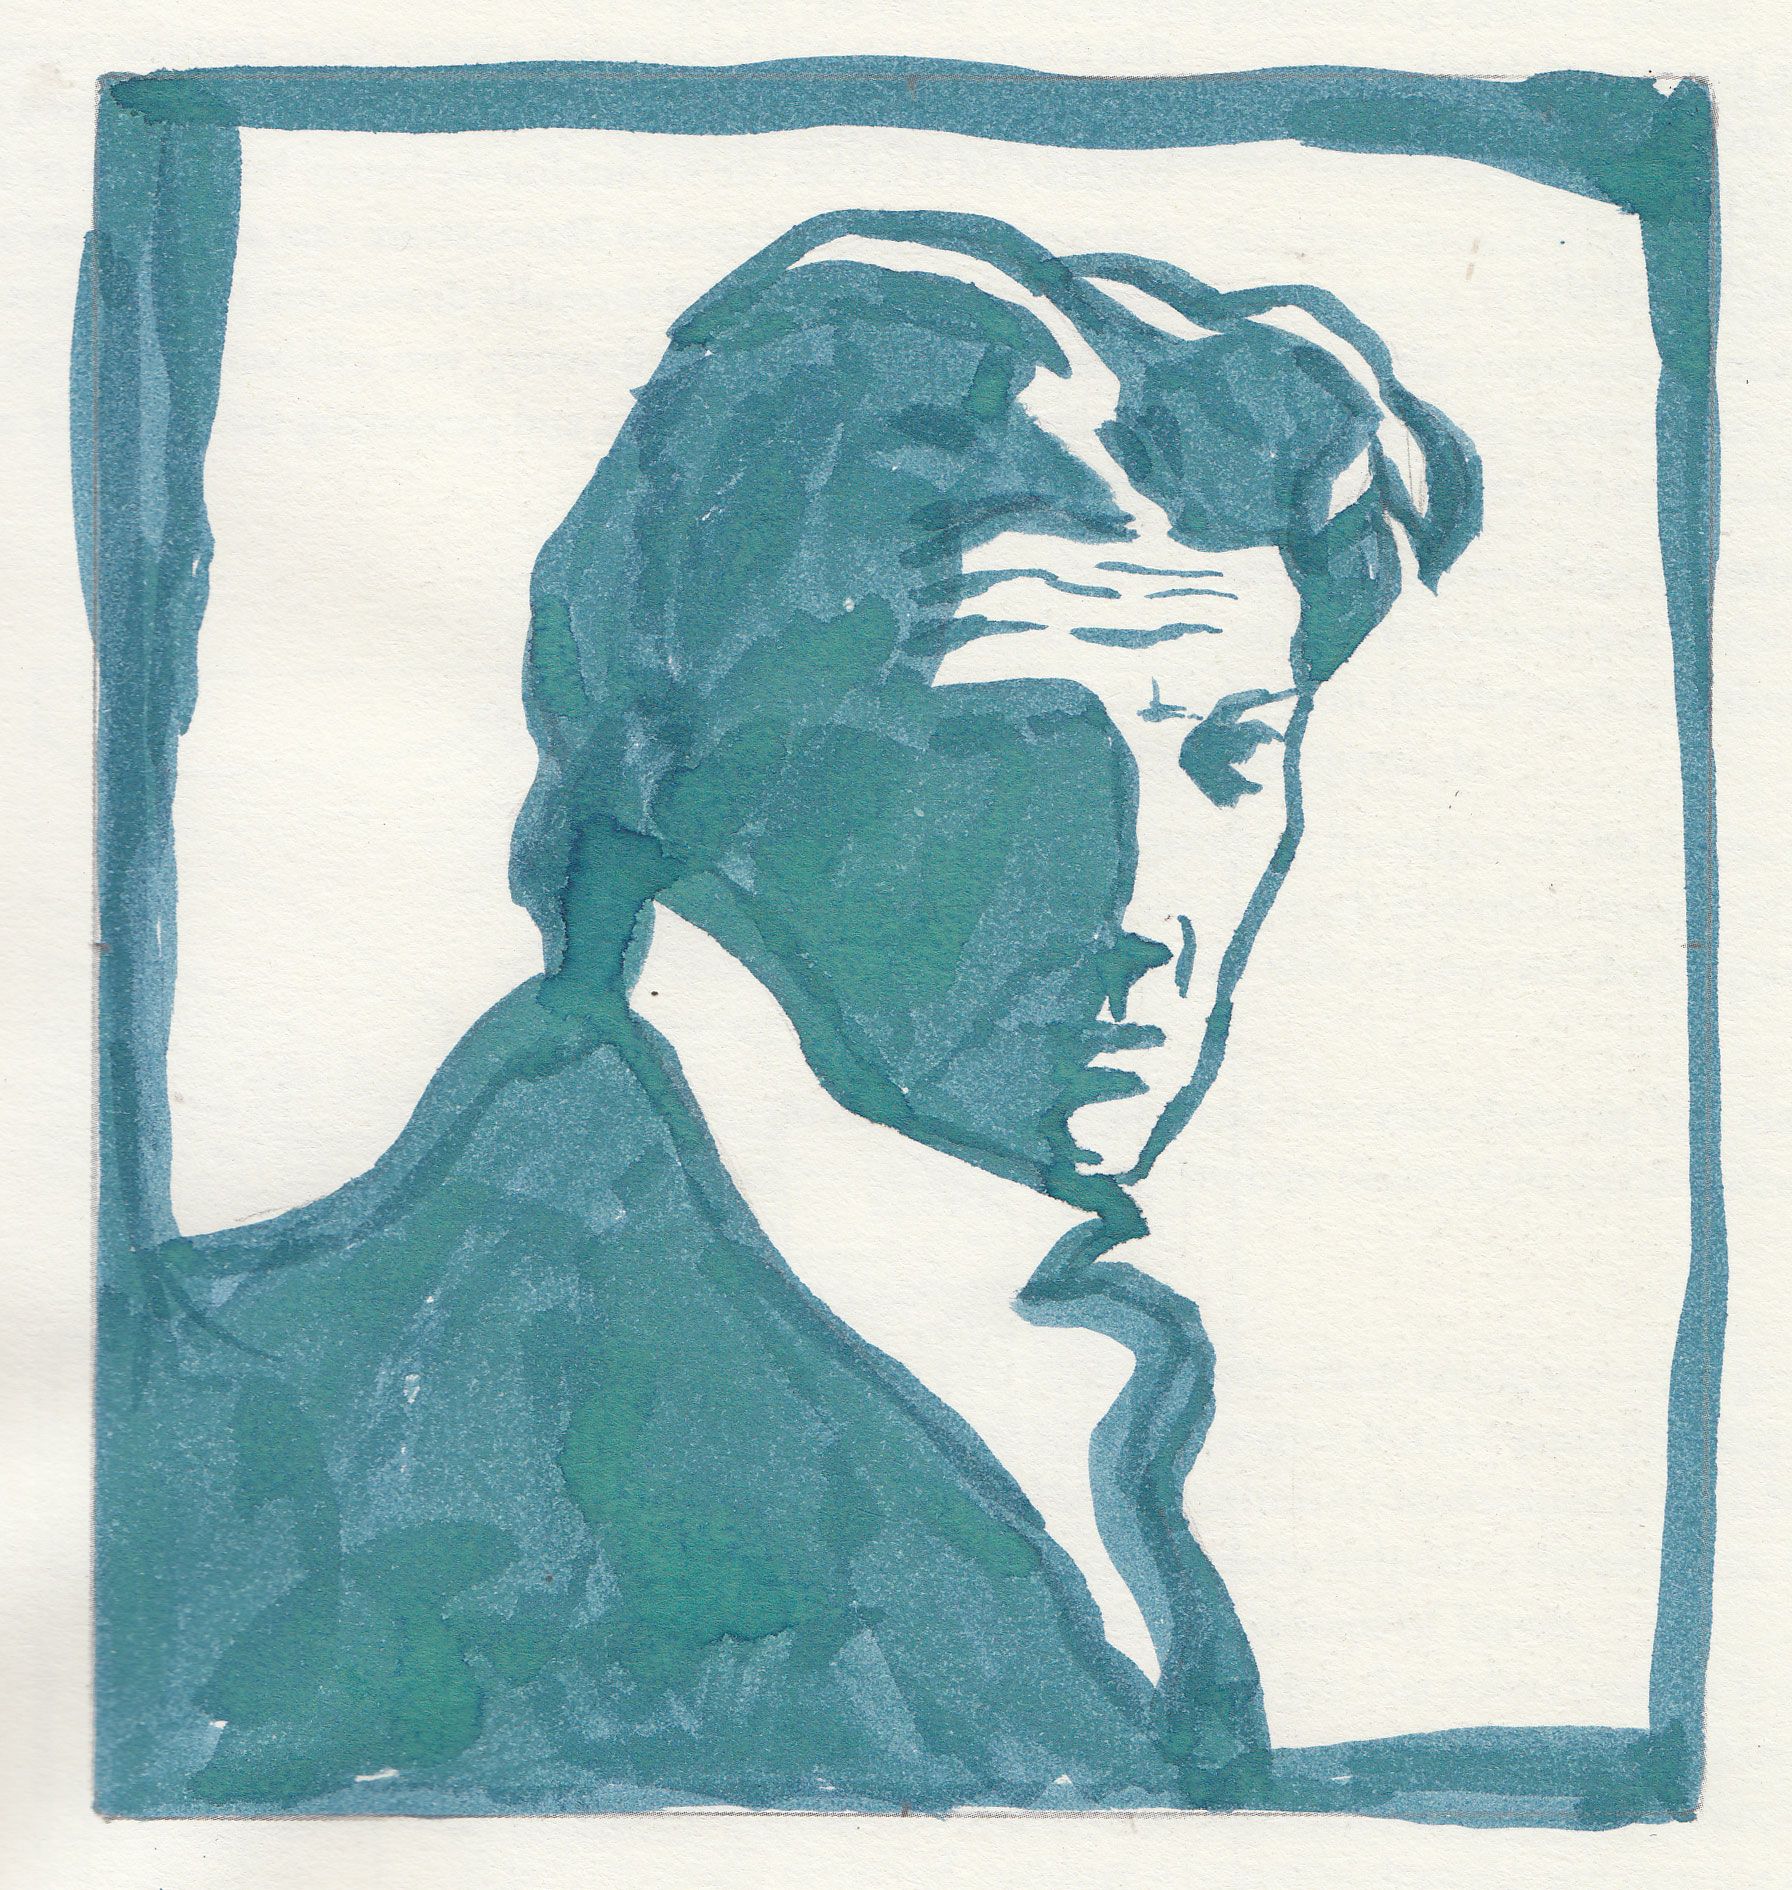
Edwards starts by getting the student to use an unfamiliar medium – ink. The permanence stops the student from noodling at the painting, but also reinforces the value lessons previously learned.
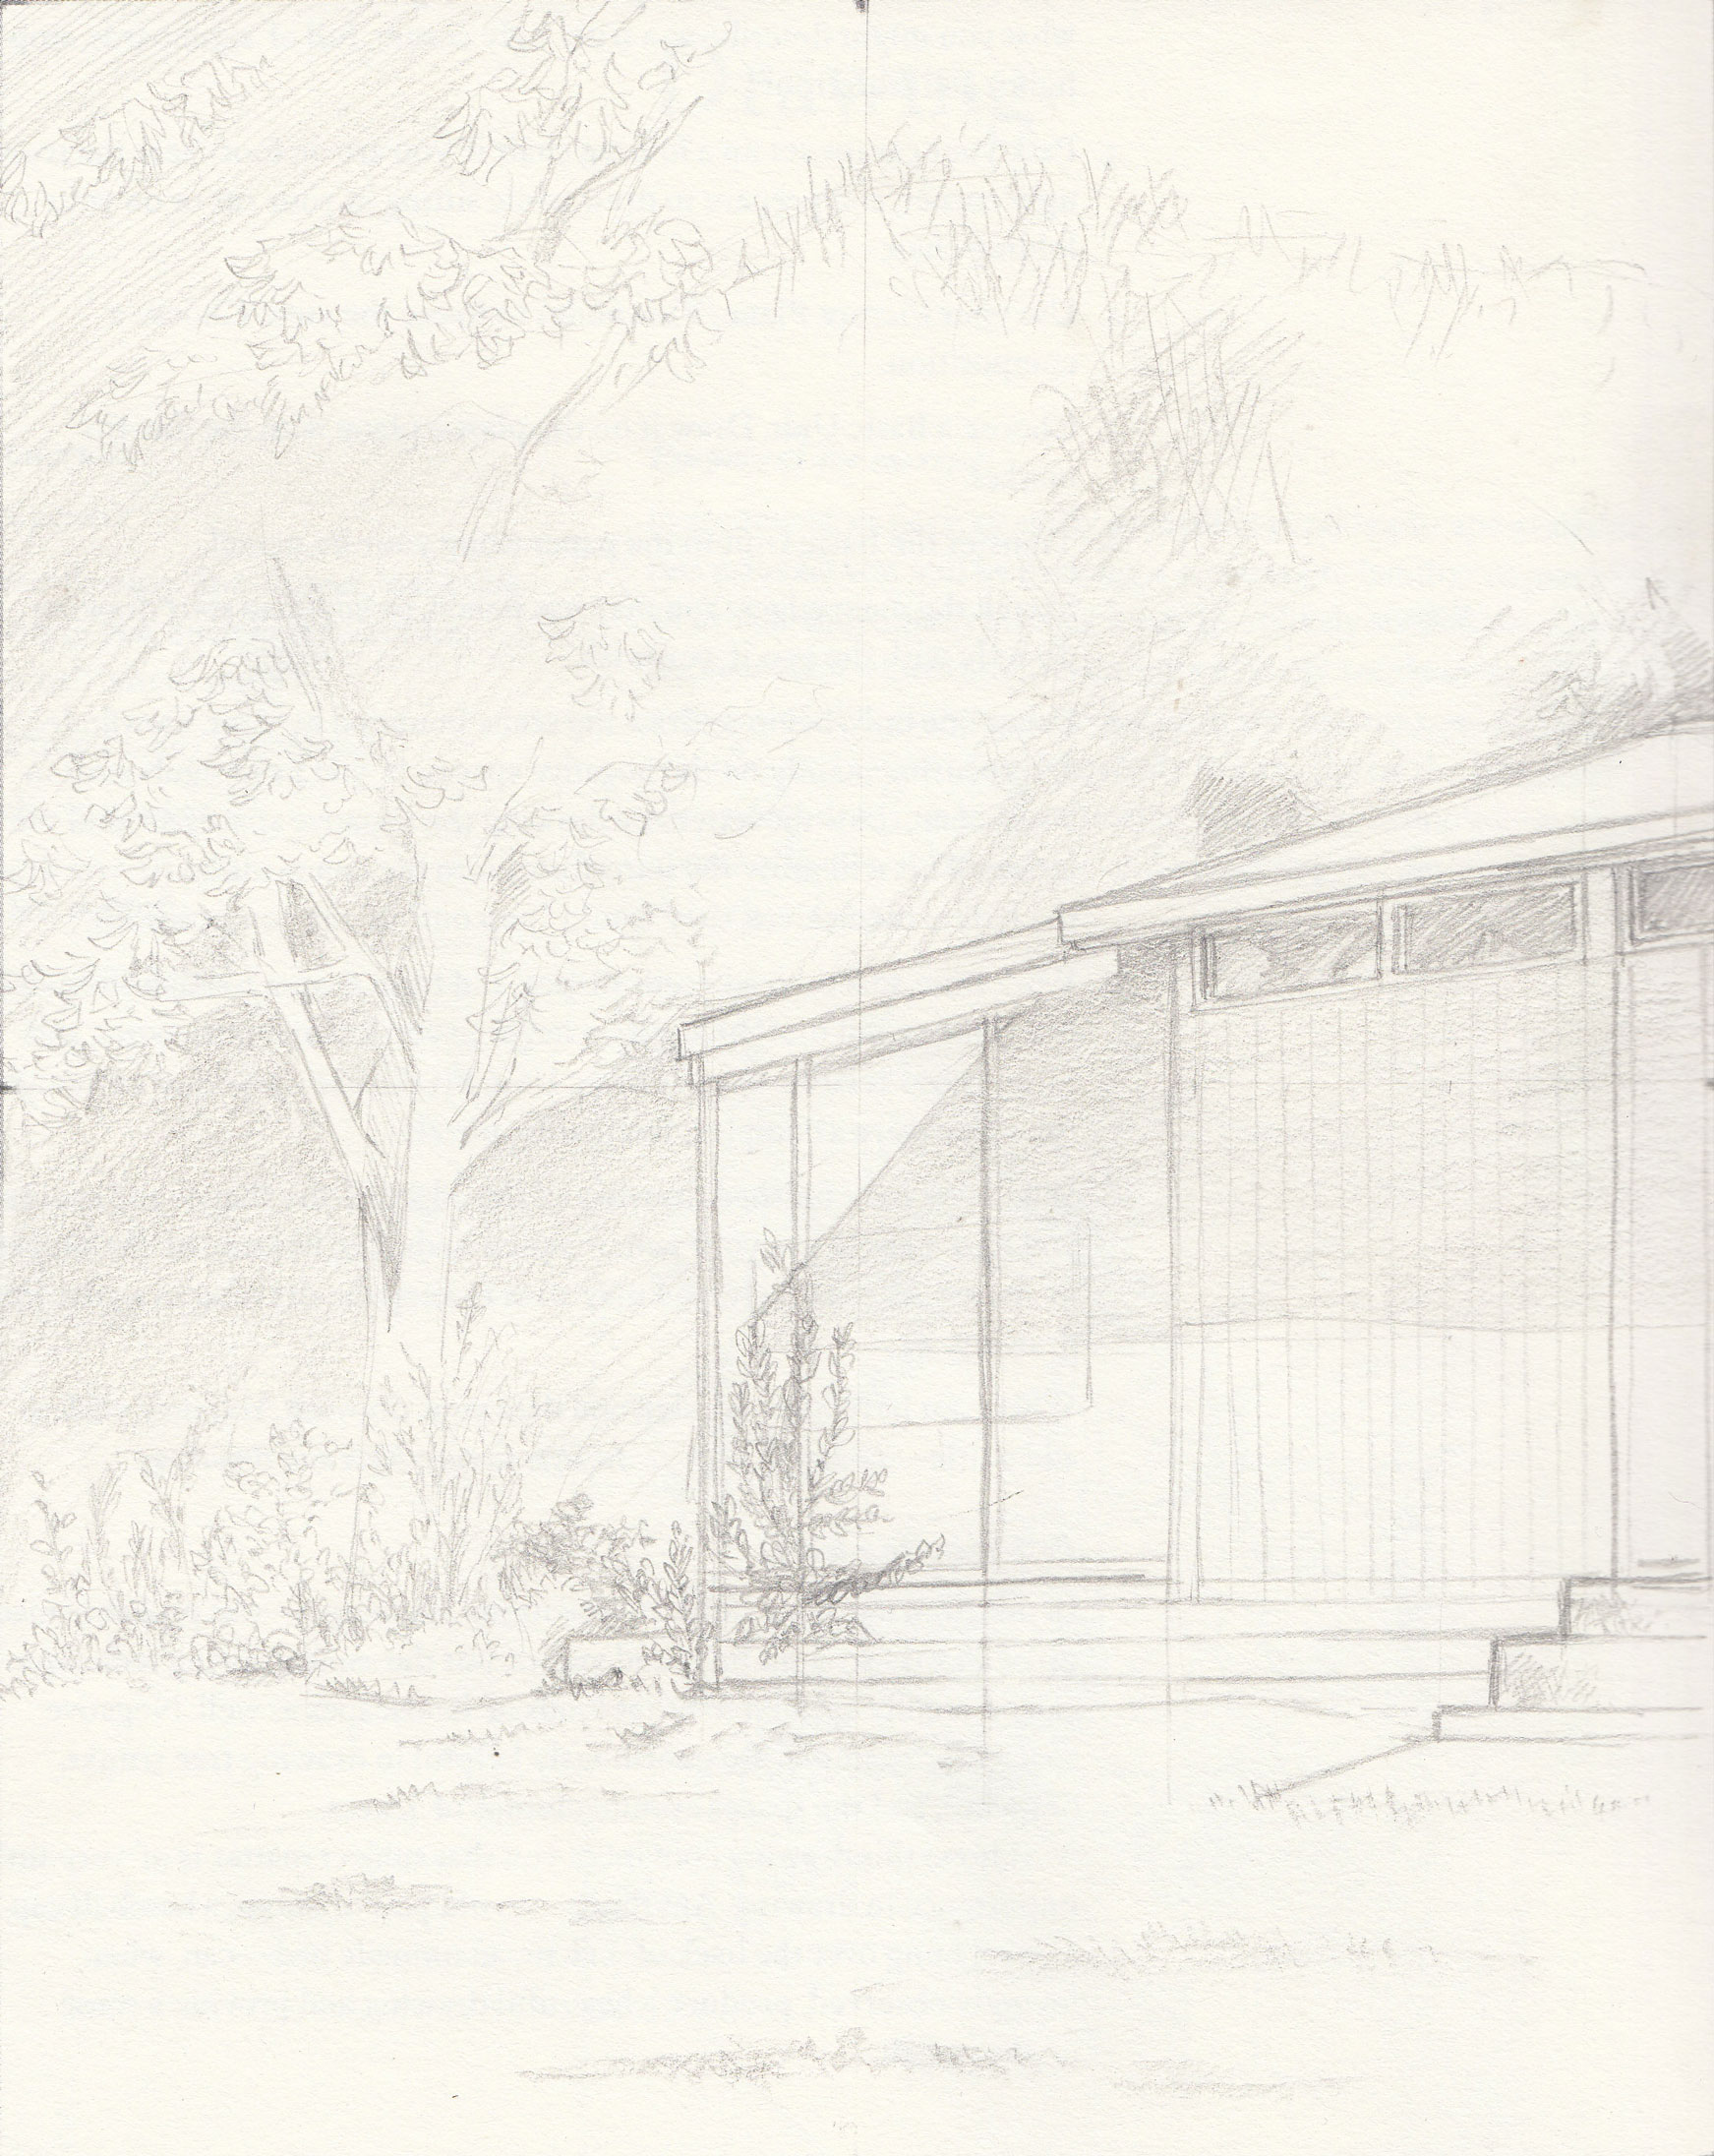
The Urban Landscape Drawing exercise has the student get out and do some pleinair work. It highlighted for me the need to practice line drawing fiddly scenes like trees and foliage, the need to work fast – the light changes dramatically on a late afternoon in October – as well as the necessity of preparing for outdoor work. I came in after 45 minutes, when I couldn’t feel my fingers!
Edwards then has the student build up their penmanship, in preparation for exercise 38, A Figure drawing in Crosshatch.
The Imaginitive Drawing exercise felt tacked on, and the paper wasn’t great at handling the volume of liquid applied to it (most of the preceeding pages in the book are now stained with pink around the binding).
The final drawing was a challenge – a detailled value study that enlarges a 1/2″ square of the subject to a 4″ canvas. I’m not sure I would have felt confident about this when I started but, after working though the book, I’m up for the challenge.
I think it would have been better to end with the self portrait, working these exercises into the main flow of the program, but there’s still two chapters of textbook left.
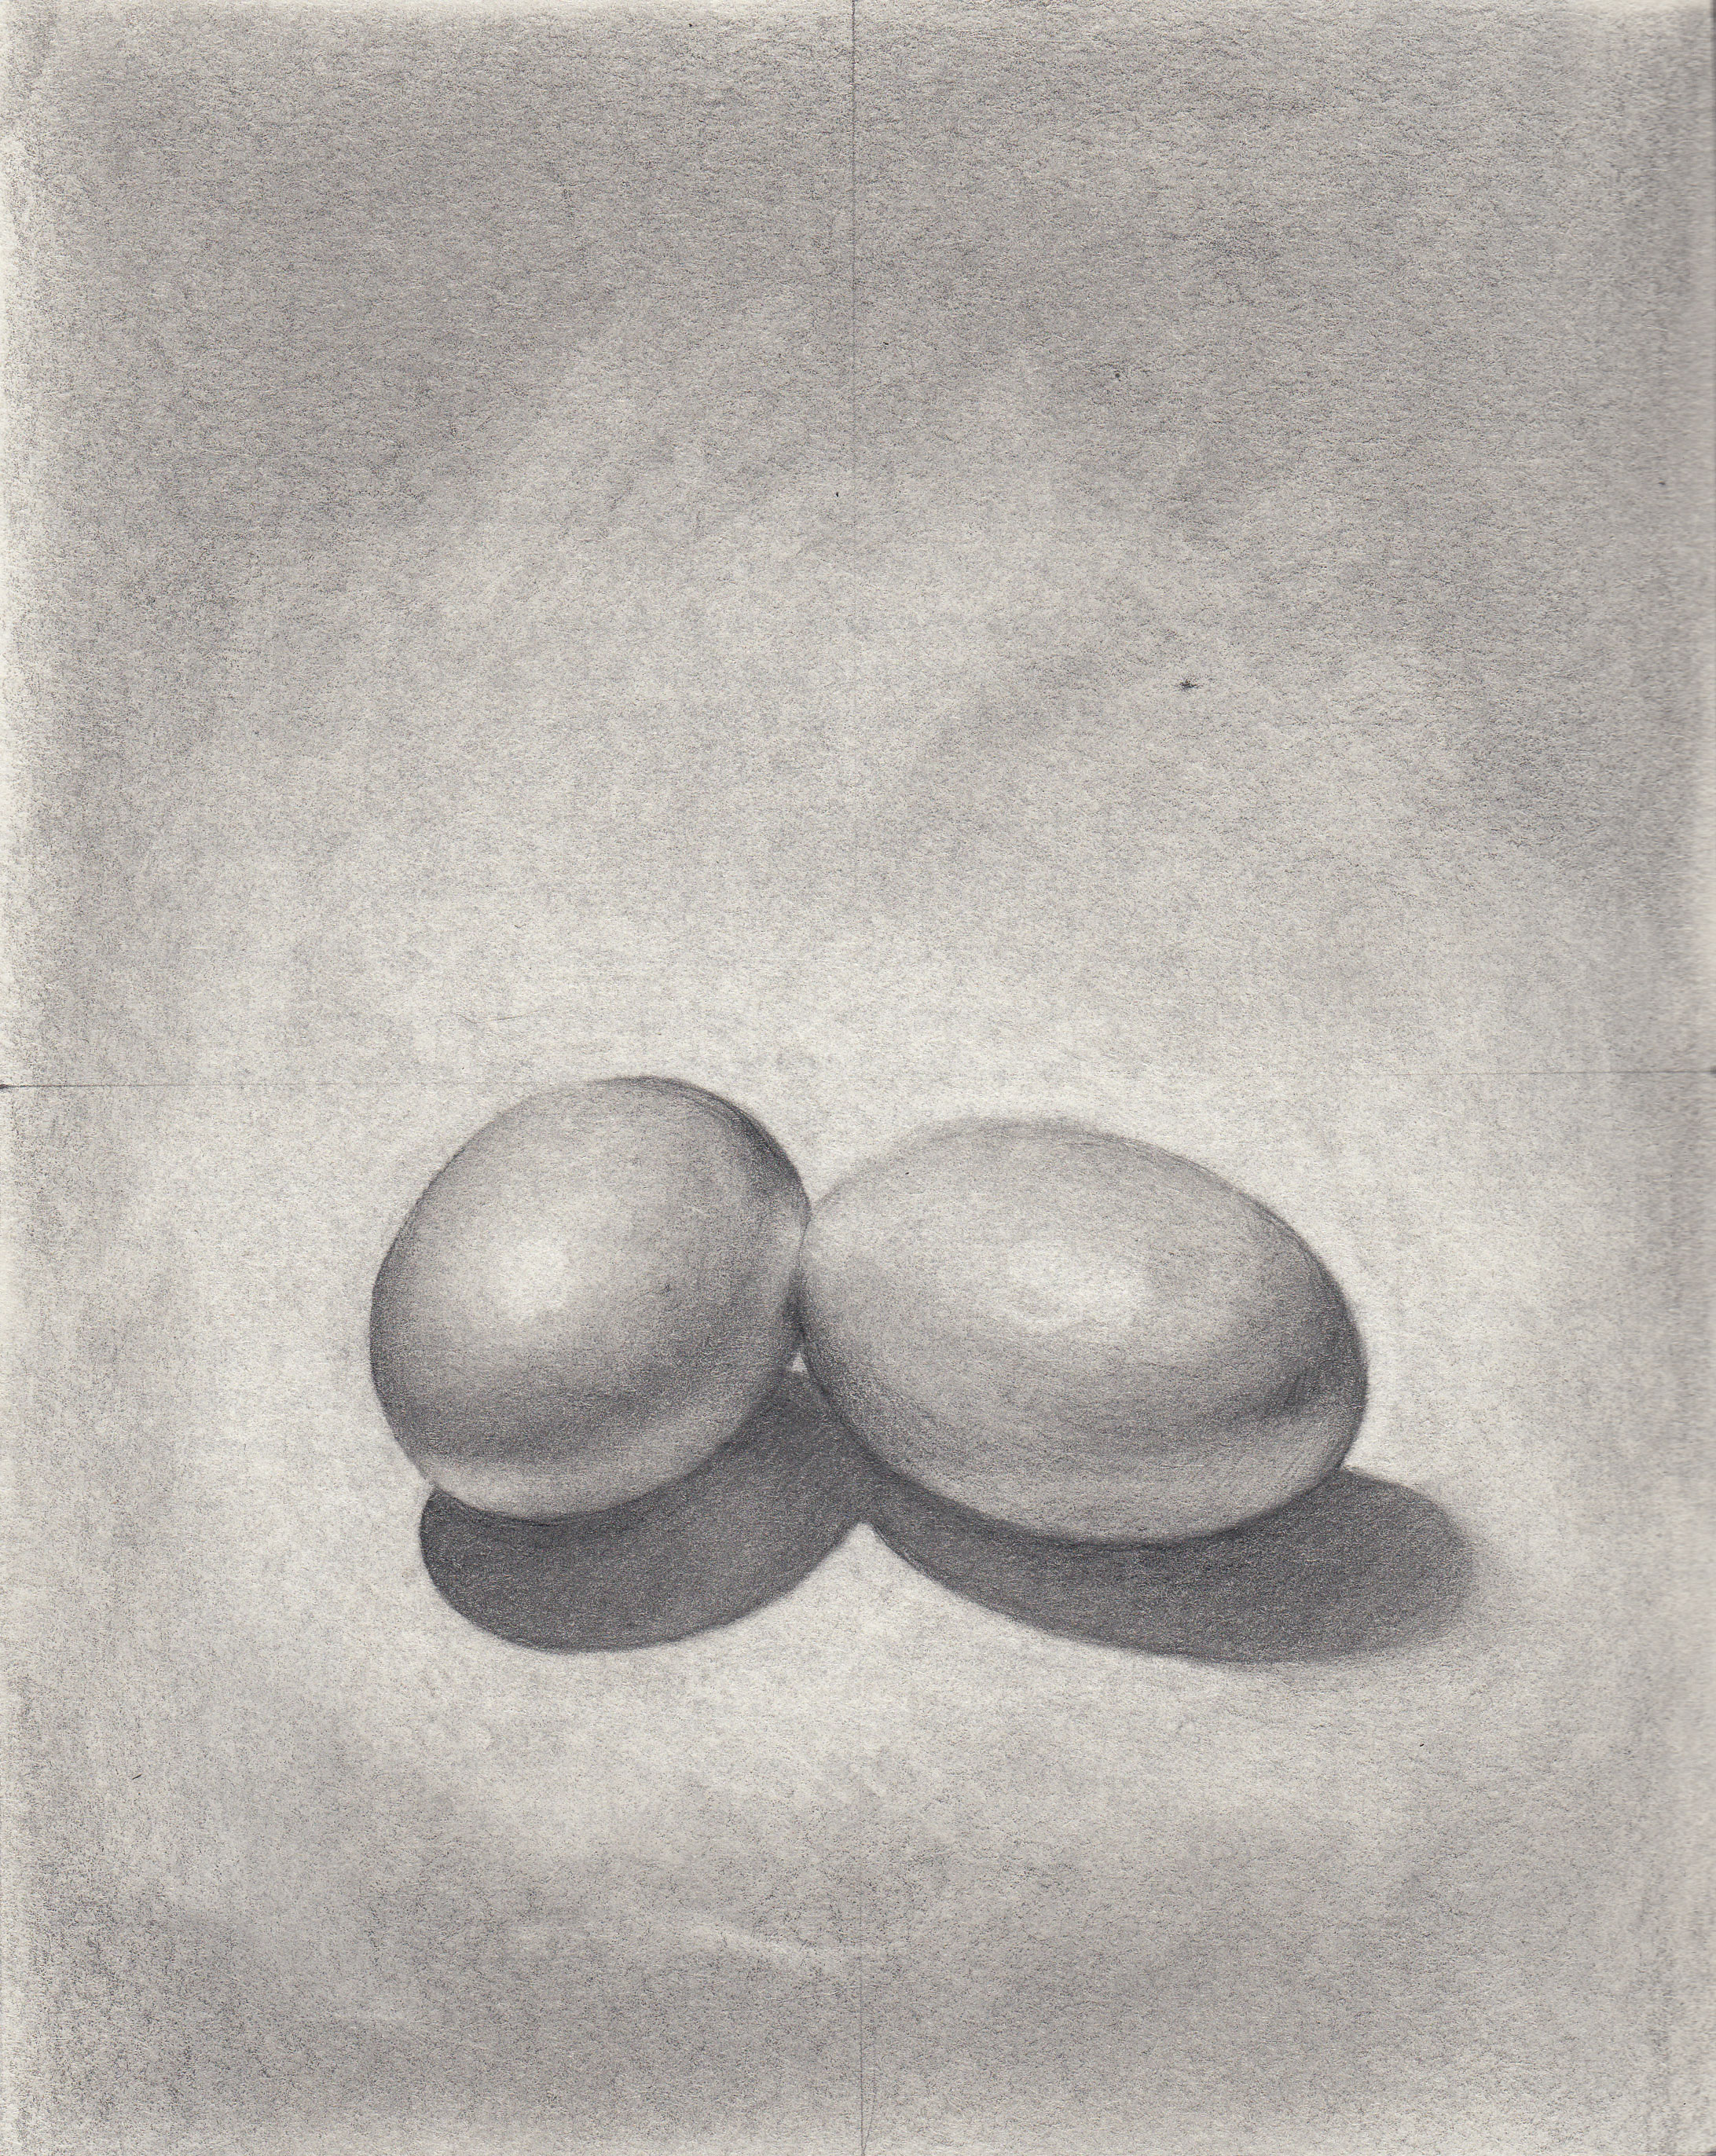
After the skill of perceiving edges, spaces and relationships comes the skill of seeing shadows, of making things appear three-dimensional.
Edwards calls this “light logic”, which isn’t a term I’ve heard anywhere else, but it makes sense – light and shadow obey very simple rules and can be reasoned out logically if you have the knack.
Exercise 30 Drawing an Egg Lighted from Above
“The perception of edges (line) leads to the perception of shapes (negative spaces and positive shapes), drawn in correct proportion and perspective (sighting). These skills lead to the perception of values (light logic), which leads to the perception of colours as values, which leads to painting.
Edwards has us repeat the trick of turning the picture upside down to help break down areas of light and dark into abstract shapes to be duplicated.
Exercise 31 Charlie Chaplin in Light and Shadow
The high contrast portrait of Charlie Chaplin shows us the was that the brain is able to extrapolate from incomplete data. I was thinking about pareidolia at this point – the psychological phenomenon in which a person can see a familiar pattern (eg: faces) in random patterns – but I don’t know if this would apply to seeing a face in a heavily distorted image of a face.
No matter how your style evolves, however, you will always be using edges, spaces, relationships, and (usually) lights and shadows, and you will depict the thing itself (the Gestalt) in your own way.
Edwards touches, briefly, accidentally, on what I would consider to be the most fundamental skill in drawing – that of knowing when to stop. They joke about artists needing someone to stand behind them with a sledgehammer and, on reflection, I can see the merit in that.
Exercise 33 Copying a Full-Face Portrait (source)
Exercise 33 Copying a Full-Face Portrait
Exercise 33 Copying a Full-Face Portrait (comparison)
The mark of a trained artist is not the ability to stop in time, apparently, but the ability to crosshatch. Most of us start out with scribbling, but once you push through that, your Hatching technique is as much a signature as, well, your signature. Edwards suggests practicing crosshatching various geometric shapes, which is definitely something I could add to my warmups.
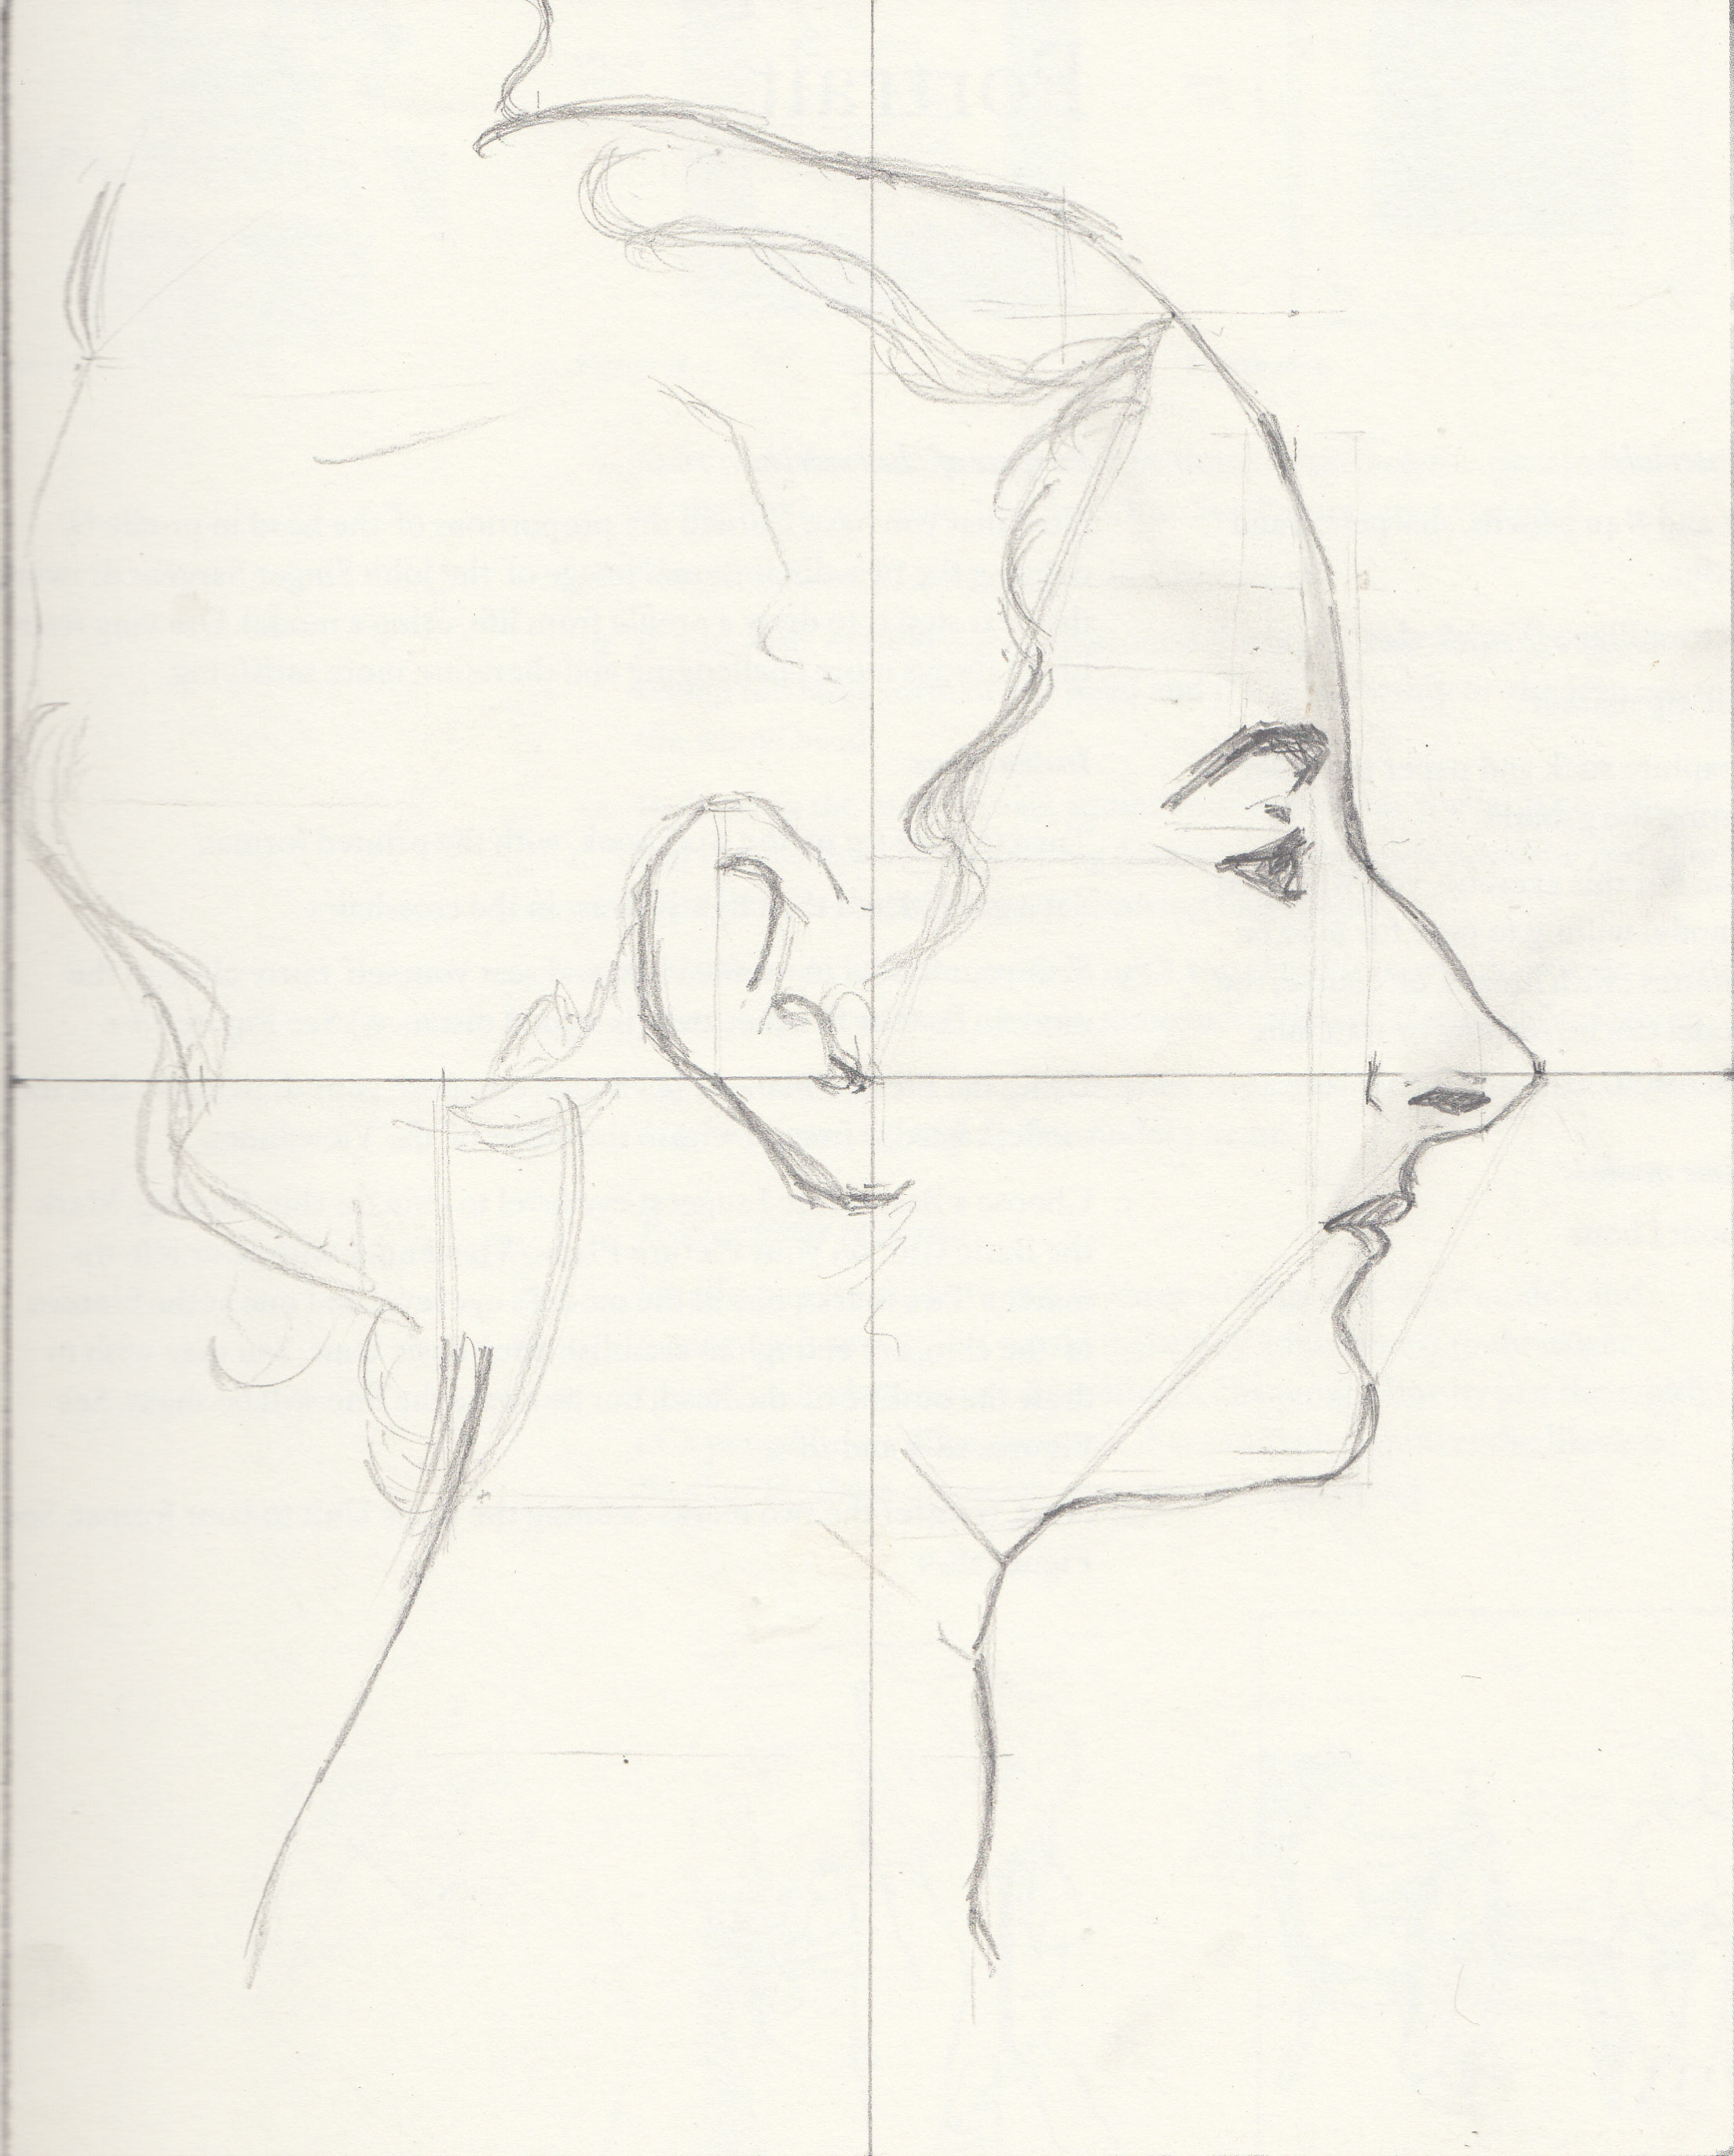
Edwards mentions that children begin drawing faces in three-quarter view around the age of ten, when they try to capture not just the likeness of the subject, but also the character. This creates a conflict with the symbol system they’re used to using, as the rotation of the face forces them to deal with asymmetry and the foreshortening of features on the far side of the face. At this point the only thing to do is to draw what you see, not what you want think you see.
Edwards points out that the space between the inner corner of the near eye and the bridge of the nose is a particularly important – and difficult – proportion, and that getting it wrong can throw off the whole drawing. Likewise, the placement of the ear has changed since the profile drawing, forward towards the face – now, the distance between the eye level and chin is equivalent to the distance between the inside corner of the eye and the back of the ear.
Another common pitfall is to widen the far side of the face and then, realising the face is too wide, to narrow the near side, resulting in a portrait closer to a frontal drawing than a three-quarter view.
Exercise 34 Drawing a Self-Portrait in Light and Shadow
Portraiture is a challenging field, both because everyone knows what a face looks like and will be able to tell when something about it is off, but also because our symbolic language is geared towards faces, even to the point of seeing faces in random patterns (a phenomenon known as pareidolia).
Because of the challenges in observing the proportions of a face and reproducing them to such a degree that the face is recognisable, and the struggle to overcome the intrinsic symbol language, combined with the immediate feedback in recognising when a face isn’t correct, realistic portraits are ideal subjects for practice.
Excercise 25A Sighting Relationships in Figure Drawing
Exercise 25A comparison
Because of these challenges, students often feel that drawing portraits, particularly recognisable ones, is beyond their reach, but drawing a head requires no more skill than drawing anything else. The problem with portraiture is the same problem with any drawing requiring “painstaking accuracy” – that we naturally enlarge things we feel are important and reduce things we feel aren’t. This occurs in the brain as part of its basic data processing, long before we try to put pencil to paper, and helps to winnow the useless from the vitally important. This isn’t great for drawing but, happily, it can be overcome with practice.
Exercise 25B Two Sketches of a Nude Girl Playing a Flute (after Matisse)
Exercise 25B comparison
We tend to overcompensate particularly when faced with optical illusions. Edwards offers an exercise wherein the artist stands in front of a mirror at arm’s length, and observes their reflection. Although it appears to be live size, if they then make a mark on the mirror showing the positions of the top of the head and the chin and step aside, the marks will only be a few inches apart.
This reduction of less important detail leads to two major issues: placing the eye line too high on the face, and misplacing the ear in profile. The eye issue occurs when the student shows themselves to disregard the height of the forehead and visible scalp.
Exercise 27 Madame X (after John Singer Sargent)
From person to person, the position of the ear doesn’t vary by much, which makes it a key landmark when determining the width of the head in profile. The distance from the chin to the corner of the eye is the same as the distance from the back of the eye to the edge of the ear. Visualising an equilateral triangle can help cement this relationship in the minds of the student.
When drawing portraits, remember the following points:
Focus on complex edges and negative spaces until you feel the shift to the visual processing mindset
Estimate the angles in relation to the vertical and horizontal
Draw what you see, without labeling or identifying elements
Draw what you see without resorting to symbolism and assumptions
Estimate the relationships between sizes
Observe and record proportions as they are, recognising the brain’s habit of changing things to suit it.
Questions to ask when drawing portraits:
Where is the point the hairline meets the forehead?
Where is the outermost curve of the tip of the nose?
What is the angle of the forehead?
What is the negative space between the hairline and the top of the nose?
If you draw a line between the top of the nose and the chin, what is the angle of that line relative to the vertical or horizontal?
What is the negative shape created by that line?
Where is the curve of the front of the neck, relative to the crosshairs?
What is the relative space between the chin and the neck?
Where is the edge of the ear in relation to the corner of the eye?
Where does the head join the neck?
What is the angle of the back of the neck?
Using negative spaces and relative measurements, anything – including a face – fits together like a jigsaw.
Exercise 28 Drawing a Profile Portrait
I couldn’t get a family member to sit still long enough to draw, so used a stock photo: Source
My copy of the workbook ends this section with a drawing of an American flag, or other striped object. The intent of this exercise is to highlight the importance of drawing what you can see, not what you expect to see, but I felt the point was somewhat lost on a non-American audience (owning a national flag is largely considered ‘a bit weird’ in the UK).
I substituted in a striped t-shirt, but I don’t feel like I had any preconceived notions of what it looked like and drawing it didn’t feel like it required much in the way of mental gymnastics. Short of buying a union flag specifically for this purpose, I’m not sure how I would fix the exercise.
Edwards’ third basic drawing skill is seeing relationships between objects, enabling the artist to accurately depict perspective and proportion. So fundamental is this skill, Edwards likens it to grammar, and I can see why – without a grasp of these relationships, a picture cannot hang together, regardless of the artist’s skill in rendering. Edwards opts to skip teaching the reader about vanishing points and the mechanics of perspective in favour of sighting. Sighting is a multi-part skill, comprising firstly of sighting angles relative to vertical and horizontal markers, and secondly of sighting relative proportions. Each measurement is made relative to a constant so that the brain is comparing ‘thing’ to ‘thing’, instead of naming objects or measuring absolute distances. The use of ratios enables the student to overcome their known reality to accurately recreate the illusion of reality on the paper.
Exercise 20 Sighting an Open Doorway
Linear perspective is a relatively recent invention, originating from Renaissance Europe. Other cultures developed their own approach to spacial relationships, notably the stepped perspective of Egyptian and East Asian art, where depth is represented vertically and objects higher up the page are understood to be further in distance from the viewer. Distant objects are often rendered the same size and with the same level of detail as near objects.
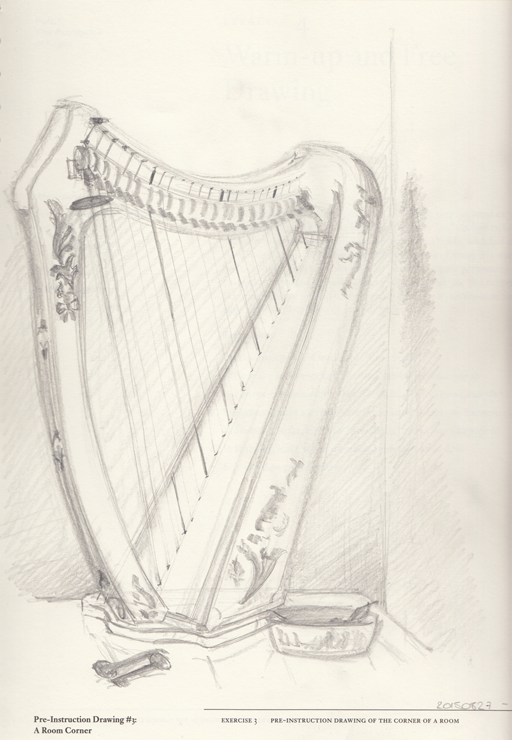
Exercise 21 Sighting a room corner
Albrecht Dürer’s perspective machine (illustrated by Dürer’s own Artist Drawing a Nude with Perspective Device and Man Drawing a Lute) was a simple frame, strung with a grid of thread or wire, and held at a fixed position. A marker on the frame ensured that the artist was always viewing the sitter or scene from the same point (something I have struggled with while doing the exercises in this book). By recreating what is visible through the grid in the manner that it is visible the artist is able to create accurate drawings, using foreshortening to create the illusion of objects receding into space.
Exercis e22 The Knee/Foot Drawing
Something that I struggled with throughout this chapter is sighting angles. I’m far more comfortable sighting the ends of a diagonal, or points of a diagonal, and joining them up, and need to practice sighting angles, at least so I can compare the two methods.
Notes on sighting angles
angles are sighted against vertical and horizons constants
angles are sighted on the picture plane. Care must be taken to maintain the integrity of the plane
creating the illusion of reality will always involve close observation of perceived forms and the rejection of known forms (symbol language).
use the triangular negative shape created between the constant and the diagonal to accurately describe the angle.
do not determine an angle to be at 45°, 30°, etc. I do this currently, but Edwards explicitly counsels against it.
when deciding between a vertical or horizontal constant, Edwards recommends whichever will make the smaller angle.
Exercise 23 A Still Life of Books on a Table
Advice for perspective drawing
work from part to adjacent part
keep checking relationships
use negative spaces – focusing only on positive shapes weakens a drawing
areas of light and shadow are signed in exactly the same way as the shapes
“If in your drawing you habitually disregard proportions, you become accustomed to the sight of distortion and lose critical ability. A person living in squalor eventually gets used to it.”
Negative spaces are the spaces between and around the subject, and the observation of those spaces makes up the second of Edwards’ five basic skills of drawing.
Exercise 14 Drawing Leaves Using Negative Spaces
Exercise 15 Drawing a Chair in Negative Space
Edwards provides an example of work by one of their students students, showing their struggle to draw an object they know and their inability to break away from calling on symbol language, and compares it to the same subject drawn by the same student using only negative spaces, and the difference is night and day.
Exercise 16 Drawing a Household Object
Since edges are shared boundaries, the edge of any object is also the edge of the negative space. By drawing the negative shape, we free ourself from what we think we know and are able to draw what we see. A particularly useful trick when drawing foreshortening.
Exercise 17 Negative-space Drawing of a Sports Photograph
Composition is the way components or the drawing are arranged. Key components include positive space, negative space and format (canvas size), and are arranged with the goal of unity in mind. When starting from life, inexperienced artists often fail to grasp the boundaries of their picture and by addressing this, the most egregious flaws in composition rectify themselves.
A child has a full awareness of the canvas when they draw, says Edwards, but this trait drops off in adolescents as young artists concentrate on individual objects at the expense of the whole. The subject becomes the most important thing and the background becomes an afterthought.
“You can never have the use of the inside of a cup without the outside. The inside and the outside go together. They’re one.”
Alan Watts
Exercise 18 Negative-space Drawing of an Actual Chair
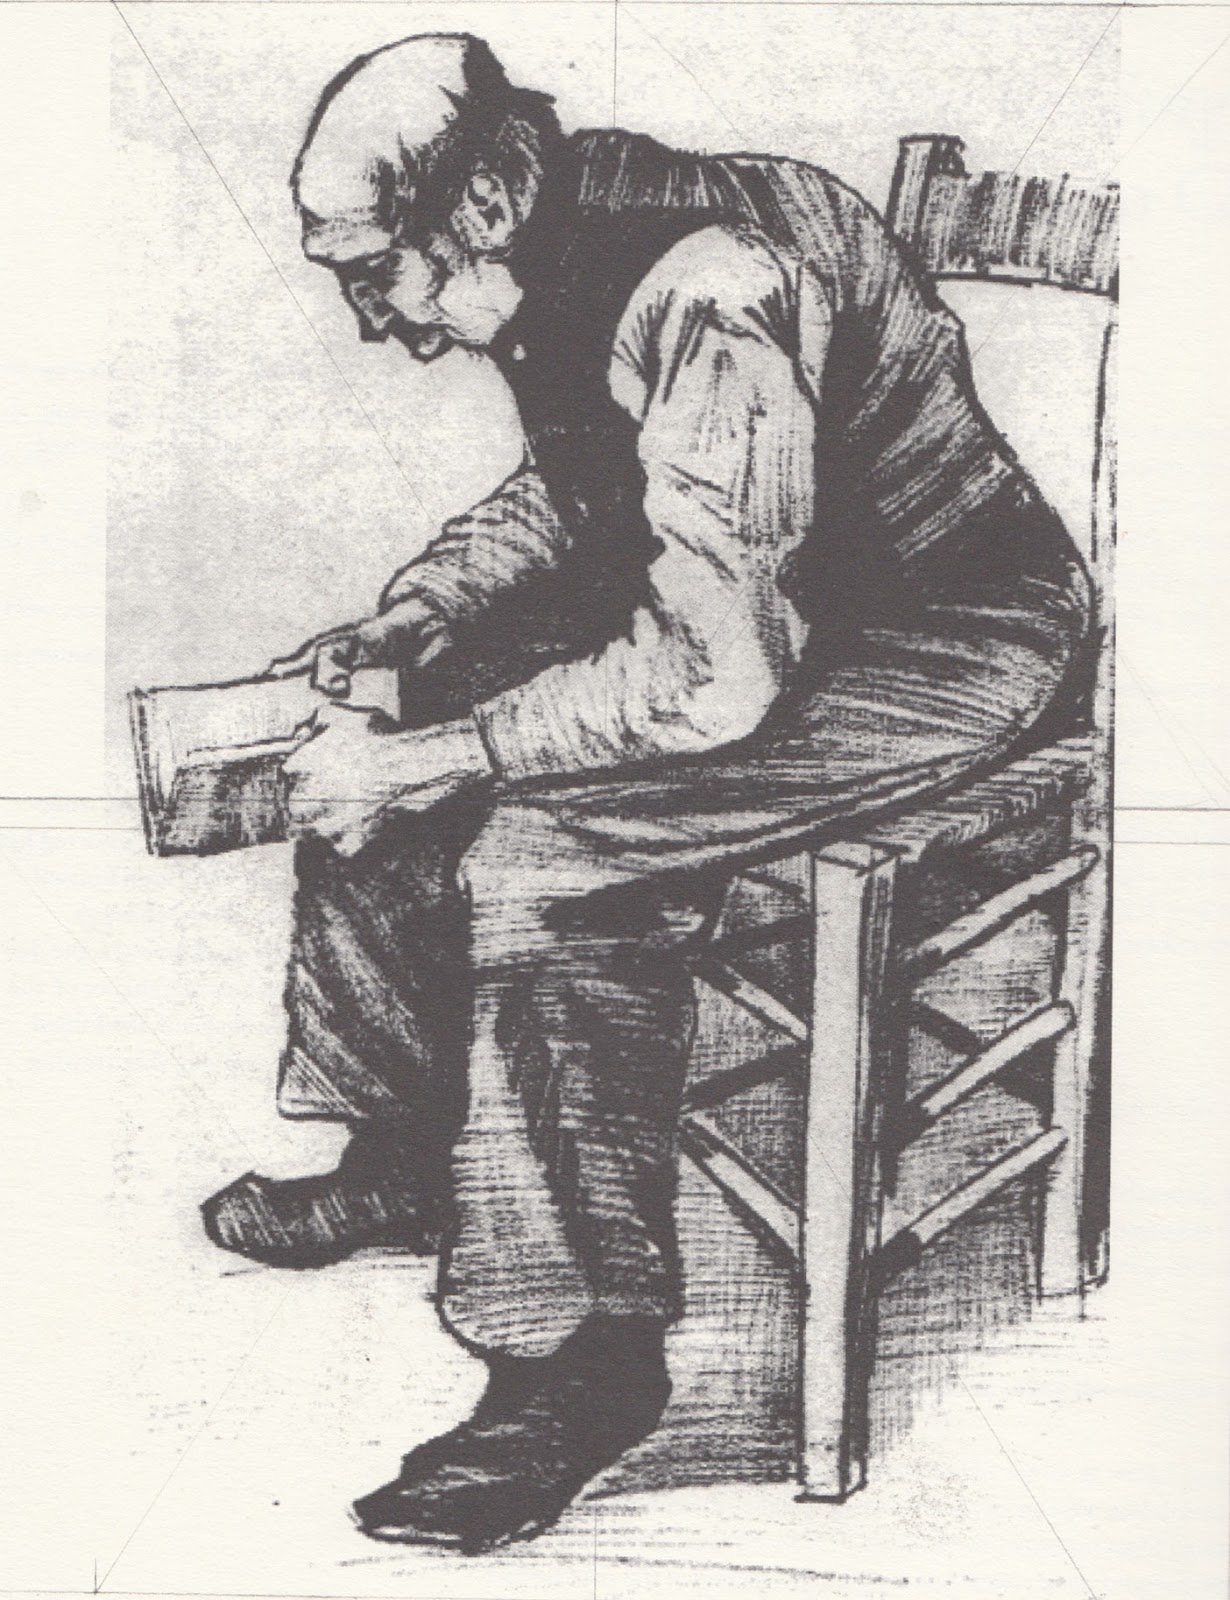
On sighting, Edwards says: “All proportions are found by comparing everything to the basic unit”. The basic unit is a distance based on something within the scene – a head-height, the width of a door, or the length of a gap, for example (note the inclusion of negative space) – that everything else is measured from. If a head is one unit, a body might be seven and a half units tall.
Exercise 19 Man Reading the Bible (after Van Gogh)
Bypassing the symbol-system of the verbal brain requires work and directed study. The last chapter inverted the subject, this chapter features pure contour drawing.
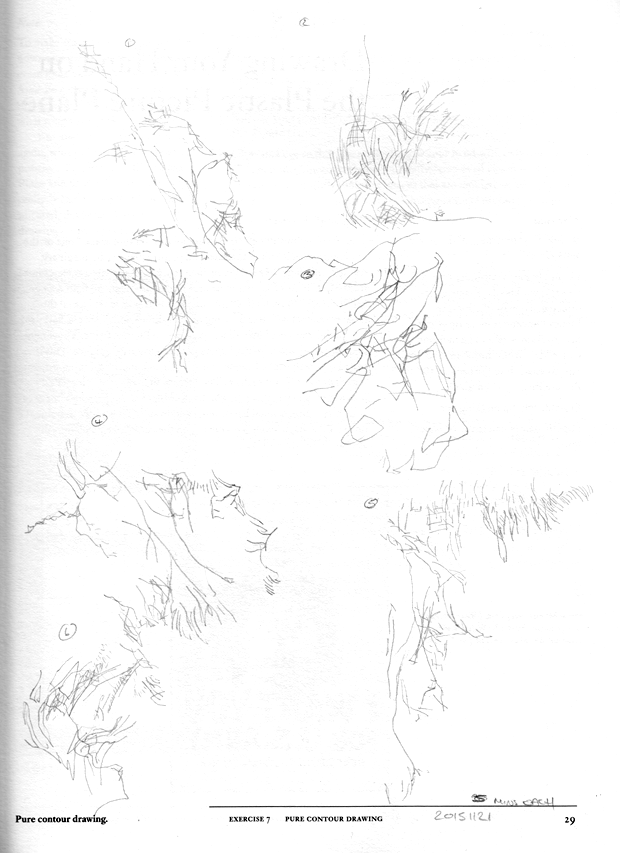
Exercise 7 Pure Contour Drawing
More pure contour drawing of crumpled paper or flowers
Pure contour drawing is an effective way of freeing up the visual brain that because it involves the close examination of large amounts of data that can’t be classified or sorted. It’s the first step in the perception of edges.
Exercise 8/9 Drawing Your Hand on the picture plane/Settng a Ground
The picture plane is analogous to Speed’s ‘flat colours on the retina’ – a two dimensional representation of a three dimensional scene. The modified contour drawing is designed to introduce the concept and to convince novice artists that realistic drawing really isn’t that hard.
Exercise 10 Transferring the Hand from Picture Plant to Paper
From 18 months, children start to draw in a manner characterised by random, circular scribbling (the circle being a natural shape given the configuration of the arm and shoulder). With the development of motor control comes early attempts at figurative drawing. Although the child is focused principally on faces, they’re primarily based on symbols and there’s little to distinguish between individuals and even non-human subjects.
The artist was 1 year 10 months when this was drawn. Soft crayon on paper. Uploaded by parent. (Wikimedia Commons; uploaded by Monika Wirthgen)
By three and a half, a child’s pictures reflect an increasing awareness of their environment: heads develop bodies (although the more important head is much larger). By four, details of clothing, fingers and toes appear, although the quantity of fingers and toes is somewhat creative (Edwards says they have seen drawings with thirty-one fingers on one hand and others with only one toe per foot). At this point, children begin to develop favourite ways of drawing various parts and repeat them frequently, embedding the technique in their muscle-memory.
Drawing by Oaklyn Ward, 3
At four to five years old, children start using narrative, exaggerating elements to convey importance, and at five or six, children start drawing landscapes, often featuring stereotypical box-like houses. Symbolism still reigns supreme: the ground is at the bottom of the picture plane and the sky is at the top; these elements are either represented by the edges of the paper or by a single line of colour.
The house may have windows with our without curtains, but the door always has a doorknob – something essential to its function. The composition of these landscapes are generally good, the pictures being balanced and executed with certainty.
Village Prelesne. Ukraine. Donetsk region. (Wikimedia Commons, uploaded by Yakudza)
By ten years old, children start to aim for greater complexity in their drawings. Composition is left by the wayside, along with a large degree of the certainty (or lack of regard for criticism) of younger childhood. Cartoons become a popular subject, using familiar symbols in a more sophisticated manner helps negate some of the criticism, and pictures are often small studies floating in space. Hands, feet and other problem areas are hidden behind the figure, or by some other contrivance, indicating a lack of confidence and a fragile ego.
Around the age of eleven, children begin to demand realism, but moving from the symbolic to the naturalistic is incredibly hard and young artists rapidly become disillusioned when they fall short. Fundamentally, many people fail to reconcile what they see with what they know is there and their verbal knowledge overrules their observation, resulting in a technically incorrect drawing. Although artists – most notably the Cubists – have explored this in the past, they do so from a foundation of technical competence and deliberate choice.
The non-verbal part of the brain is concerned with spatial relationships – how deep is that curve, how long is that line, what is the angle between here and there? When it is active, or ability to label what we’re seeing falls away and we see only the whole image as a collection of masses to be described in relation to each other.
The shift to non-verbal processing can be made more difficult by the verbal brain’s habit of attaching preconceptions to how things look (symbolic form language). We can assist the shift away from the symbolic by drawing things that are unfamiliar, confusing the verbal brain and letting the visual brain work with no notion of how things should look. Faces are notoriously easy to recognise, even upside down, although the Thatcher effect and our ability to see faces in clouds or wood grain suggests that that ability is based on the configuration of facial features rather than detailed observation of component elements.
Learning to draw is learning to access non-verbal thought processes by directing your attention towards visual information the verbal mode can’t process. I would argue that this bypassing of the everyday thought process, along with the sense of ‘lost time’ when emerging from the visual mode of processing, makes drawing an altered state of consciousness. With that concept in mind, I can provoke the shift to visual-mode by using similar tools to the ones I use to start meditation – breathing exercises, music, scent, or some small preliminary ritual (perhaps sharpening pencils and laying them out).
I struggled to keep focused during the face/vase exercise. My mind kept wandering to thinking about the books I was reading or plans for the future, and I’m not sure if I managed the mental shift at all. This exercise was done during a business trip to the States, so I’d argue that jetlag was a factor, but equally, Edwards did warn that the shift couldn’t be observed and I was looking for it. On the first try, filling in the right profile, I couldn’t see the face by the time I got to the chin, and went back to correct the ‘vase’.
I experienced the mental block Edwards describes and overcame it by concentrating on the angles, line length and proportions on the line I was drawing. I did the left-handed task as well, to see what the difference was and also have another got at the task. It was a lot harder, mainly because I couldn’t see the line I was supposed to be copying, but I again I struggled to reach the correct thought mode.
Drawing upside down
In all of the pictures, the face was the hardest part to draw; the
ability to recognise a face or hands – even upside down – was
surprisingly hard to overcome.
Exercise 6A: Portrait of Igor Stravinsky (after Picasso)
Exercise 6B: Frontal view of a horse (study after unknown artist)
Exercise 6C: Horse and Rider (study after unknown artist)
Exercise 6D: Seated Woman (after Egon Schiele)
As with the face/vase illusion, I had a lot of mental chatter and ignoring it led to increasingly emotive subjects (imagined conversations, ‘what if’ scenarios, anxieties, regrets). At one point during the first drawing, my mind simply repeated the phrase ‘this is boring’ and pointing out how uncomfortable I was and urging me to take a break. Although I was largely able to ignore the intrusive thoughts, it was difficult to stay on task. For the second task, I began blocking in approximate masses before drawing and found that very helpful (Edwards said to copy the picture, she never specified how to go about it), but in the third drawing, my mind wandered completely, resulting in glaring inaccuracies.
During the fourth drawing, my partner was playing music in another room and that gave my verbal thought processes something to puzzle over, resulting in fewer distractions and considerably fewer inaccuracies. Once the music switched off, the distraction returned, but I was already engaged with the picture and able to finish with minimal fuss.
Drawing is a global skill, based on a finite set if components. Like other global skills (eg: reading, driving, walking), drawing becomes automatic with practice and no longer requires attention to the component parts. The five basic skills of drawing are:
Perception of edges
Perception of spaces
Perception of relationships
Perception of light and shadow
Perception of the whole
There are also two additional, advanced skills: drawing from memory and drawing from imagination The fifth skill (perception of the whole) develops as a natural extension of the first four and does not require specific training, but the first four are pretty much compulsory. Edwards recommends practising them in the order of line > value > colour > painting, much like Speed.
The first few chapters spend a long time discussing the science behind the DRSB method, as well as the repetition of the fundamental assumption of the book: that “drawing is a skill that can be learned by every normal person with average eyesight and average eye-hand coordination” (p3), and that the student does not need to learn how to draw so much as they need to learn how to see by actively engaging their brain in the activity.
“To put it another way, you already know how to draw, but old habits of seeing interfere with that ability and block it.” (p7)
Switching between brain modes
When deciding between the left- and right-brain modes, Edwards says that neuroscientists believe that tasks are performed by one hemisphere or another based on either how fast the hemisphere begins to tackle the task, or which hemisphere most likes the task (perhaps this is the subconscious mind assigning tasks to the thought process it feels is best suited). The dominant left- brain will turn down tasks that are outside its comfort zone, and the assignments in the book are designed to activate the right hemisphere by presenting the left-brain with tasks it is supremely unsuited to.
Drawing as an altered state of consciousness
In DRSB, the key to learning to draw is to create a shift in consciousness which suppresses the language-processing parts of the brain (shift to R-mode, suppress L-mode) and to become familiar enough with this process that it can be triggered at will.
“One drawing task is no harder than any other. The same skills and ways of seeing are involved in drawing still-life setups, and portrait drawing. It’s all the same thing.” (p8)
Exercises
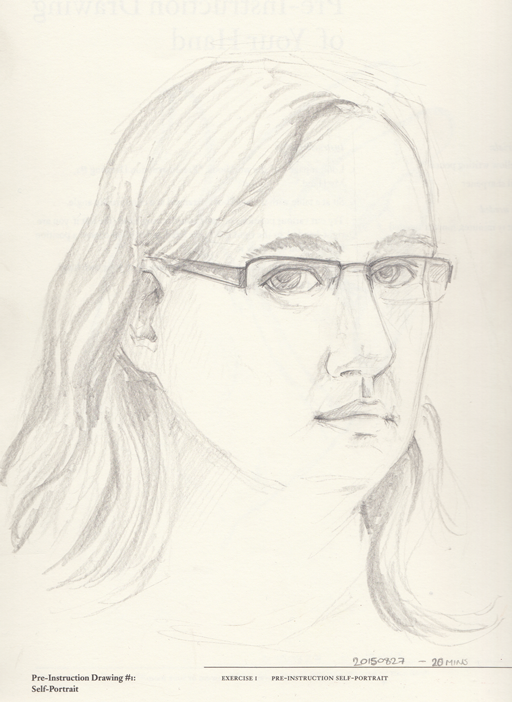
Drawing my self-portrait was an interesting exercise; I hadn’t appreciated how much my glasses shrank my eyes and it’s the one area I feel is particularly inaccurate – the natural inclination to emphasise the the eyes in addition to knowing that my eyes aren’t as small as they appear has led to inconsistencies. Also, I don’t think my nose is that long.
Exercise 1: Pre-Instruction Self-Portrait
My hand was the first of the pre-instruction drawings I attempted, and it looks like a warm-up piece to me. The lines are heavy and the fingers bear more than a passing resemblance to sausages. It’s not a bad drawing, but it’s not great.
Exercise 2: Pre-Instruction Hand Drawing
I should have taken a break between drawings and I think this is particularly evident with the still-life. The keys were the last things added to the picture and they are definitely not representative of what I could see. Not pictured in this scan: atrocious planning skills – the left of the picture is butted up against the spine of the book while the right disappears into the void.
Exercise 3:Pre-Instruction Still Life
The drawing from memory task wasn’t in the workbook I had, but was in the theory book (my theory book was published later than my workbook), where Edwards discusses the use of symbols which characterises child-like drawings and insinuates itself in observational drawings when the artist hasn’t yet developed the skill to accurately observe the forms in front of them. Enough said, really.
Exercise 3.5: Pre-Instruction Drawing from Memory
I suppose that most people don’t have the same amount of experience with making different marks and enjoy the chance to experiment. I certainly enjoyed it, but I’m not sure how much I learned. Perhaps I need to be more varied in the marks I use rather than going for the same direct approach each time.